A Step-by-step Guide to Install your CCTV System
In the age of technology and digitalisation, CCTV systems in Singapore are growing in prevalence, being used for both residential and commercial purposes. According to IHS Markit’s latest report, over one billion surveillance cameras will be installed worldwide! No doubt, CCTVS systems are one of the best ways to enhance security and safeguard personal belongings and data. Much consideration goes into getting a CCTV system, from the brand to the features and functions offered. However, the decision-making does not stop there. Once you have your CCTV system, you need to ponder over having it professionally installed or install it on your own. If you have decided to do it yourself, then this article serves as the perfect guide to help you through the CCTV installation process.
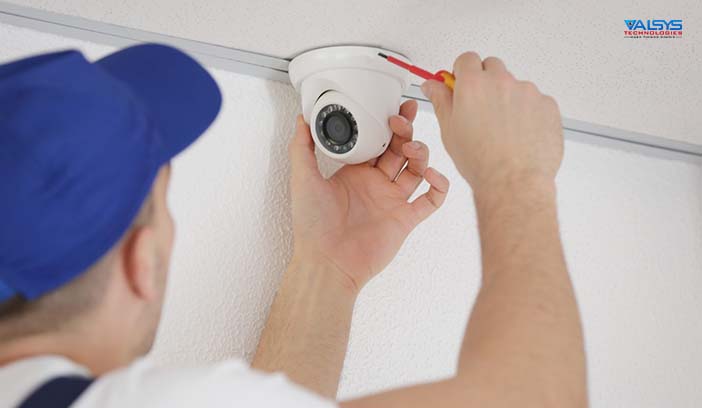
Step 1: Placement of Surveillance Camera
Before even getting into the nitty gritty of CCTV installation in Singapore, it is important to first think about the placement of your CCTV system. You would want to mount it in a practical location with a wide field of angle and minimal glare. In commercial applications, it is recommended to install your CCTV system near entrances to better monitor when others come and go.
Alternatively, you might also want to have extra cameras in more deserted areas too as intruders may leverage those routes with the impression that they are well hidden. With regards to installing a CCTV system in Singapore residential areas, bear in mind that there are certain regulations to follow. For instance, a permit is required if you wish to install it along HDB corridors.
Step 2: Placement of DVR
After deciding where your camera will be, think about your digital video recorder (DVR) next. The DVR captures the video footage from the camera, allowing you to store and replay all recordings should there be a need to. It is advisable to keep your DVR in a locked compartment to keep all footage safe.
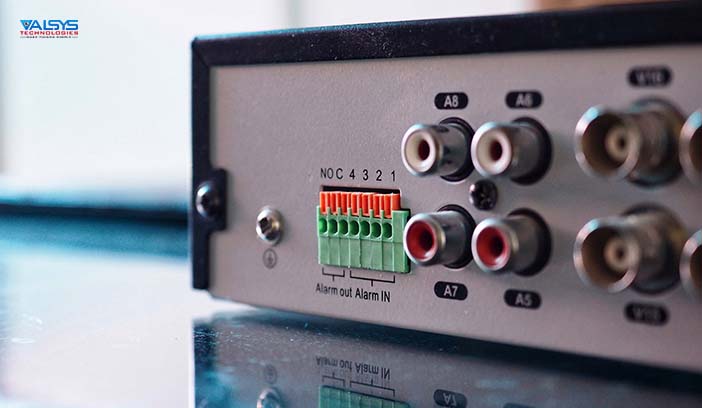
Step 3: Cable Management and Connection
Now, we come to the more technical aspect of the installation process. To ensure that your CCTV system works, cables and wires should be properly connected. A BNC port is required to connect with the video cable. 1.5cm of the video cable outer covering should be removed to expose the braids. Next, slide the crimping barrel onto the cable. Ensure that the wider diameter faces the cable end. Remove the white insulator encompassing the innermost cable and insert this exposed cable into the BNC port. Screw the crimping barrel well, and finally, connect the DVR output port to the screen you want. Apart from the BNC, you can use a Scart lead or VGA lead to connect to your monitor as well.
Good cable management contributes to a long-lasting CCTV system. All cables connecting the surveillance camera to the DVR unit should have a planned pathway. It is best to use wire mouldings to keep the cables secure and you can even nail the mouldings along the path.
Step 4: Powering and Programming your DVR
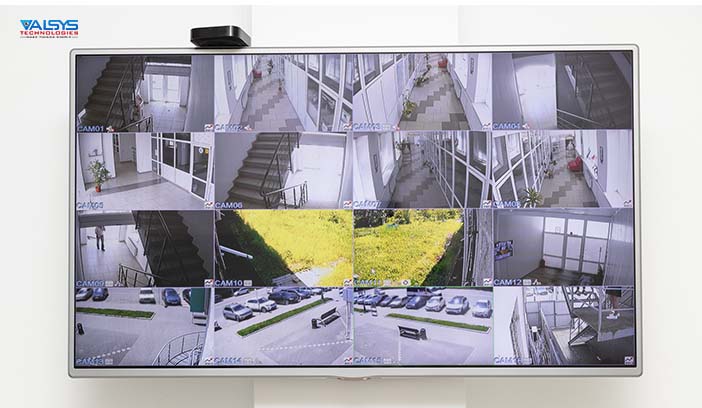
Finally, with the connections all set up, you are ready to test if your CCTV installation endeavours led to success. Start by powering on the different components, from the surveillance camera to the DVR and screen display. Next, programme your DVR. A manual should be provided to guide you through this procedure. Depending on your DVR, a hard drive installation may be needed. When that is done, preview your camera footage. If you have multiple cameras installed, assess each camera feed to ensure that they are all in good working condition and that they are positioned in the way you desire for optimal monitoring.
And with that, you are well on your way to enjoying a safer working and living environment! Ultimately, the choice of engaging a professional or doing it on your own boils down to your experience, preference and budget. Either way, what’s most crucial is ensuring that the outcome of enhanced safety is achieved.
At Valsys Technologies, we strive to deliver simple yet effective security solutions. Looking for a quality CCTV system? Contact us today and we will be happy to support you from product selection to the installation process.


